Editing a Verilog Component
This guide walks you through changing the Verilog of a component without leaving DigSim. You start from an example circuit with a 4-bit counter written in Verilog, make it count by three instead of by one, and run it again. It takes about ten minutes, and you will learn to:
- open the Verilog of a component in the editor,
- format the Verilog,
- change it and synthesize it, so that the component runs the new version,
- find and fix an error that Yosys reports,
- run the circuit with the changed component.
You need DigSim installed (see Installation) and a clone of the repository, which has the example circuits, see Run from source. If you haven't used DigSim before, start with Your First Circuit.
Note
This guide changes circuits/yosys_counter/counter.v in your clone. Step 10 shows
how to get the original back.
1. Load the counter circuit
Open a terminal in the root folder of your clone and start DigSim with the example circuit:
uv run -m digsim.app --load circuits/yosys_counter/counter_yosys_verilog.circuit
You can also start DigSim as usual, choose File > Open, and open
circuits/yosys_counter/counter_yosys_verilog.circuit.
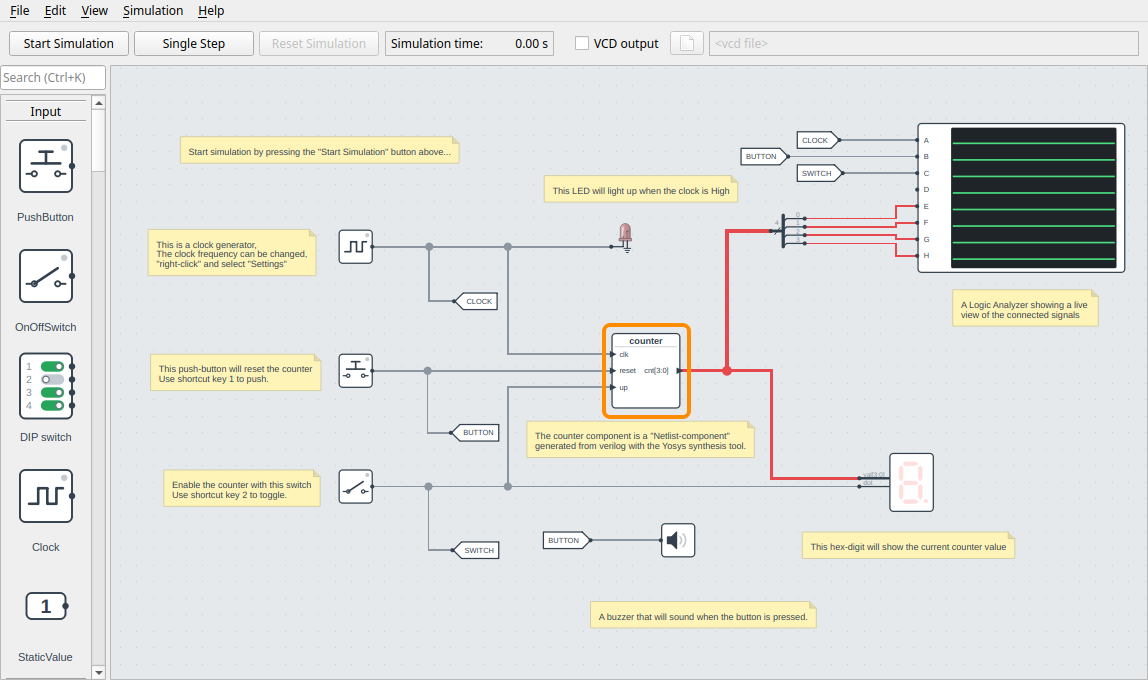
The circuit has these parts:
- counter (framed): a Verilog component, made from the Verilog file
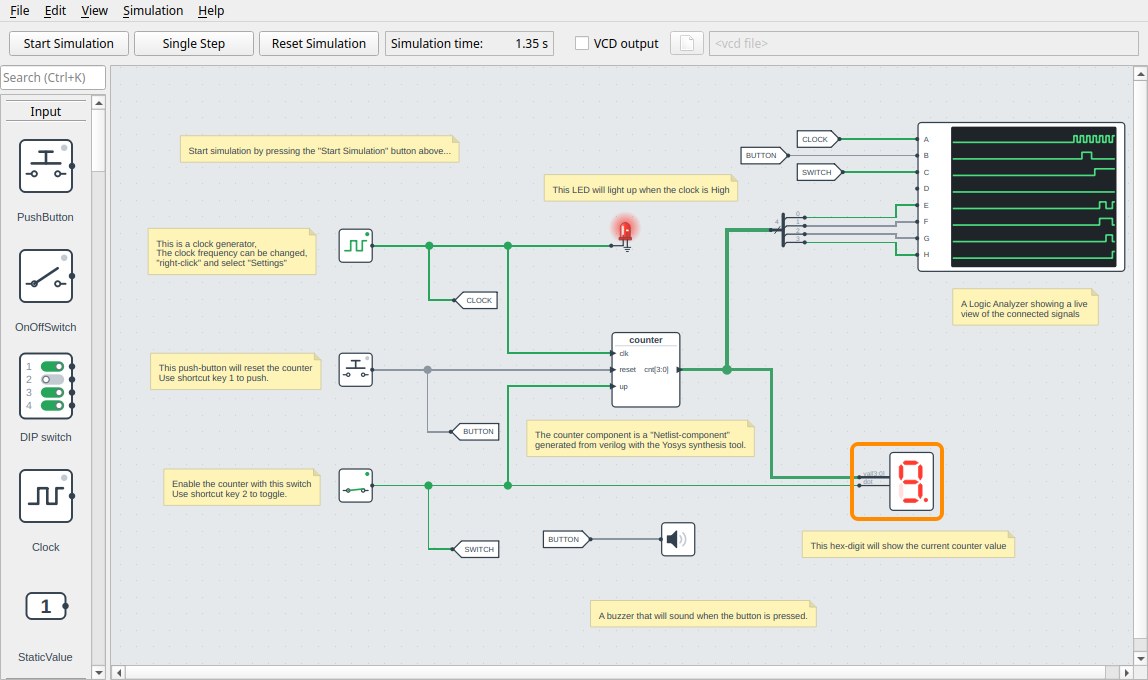
circuits/yosys_counter/counter.v. It has the inputsclk,resetandup, and the 4-bit outputcnt. - A clock on the left drives
clk, five times a second. The LED next to it lights while the clock is high. - A push button drives
reset. Press it with the mouse, or with the 1 key. - A switch drives
up, which enables the counter. Toggle it with the mouse, or with the 2 key. It also drives the dot of the hex digit. - A hex digit shows
cnt, and a logic analyzer shows all the signals over time.
2. Run the counter as it is
Before changing anything, see what the counter does now:
- Click Start Simulation.
- Click the push button (or press 1) to reset the counter to 0.
- Click the switch (or press 2) to turn it on.
The hex digit counts 0, 1, 2, ... up to F, and starts over at 0. One step for each clock cycle.
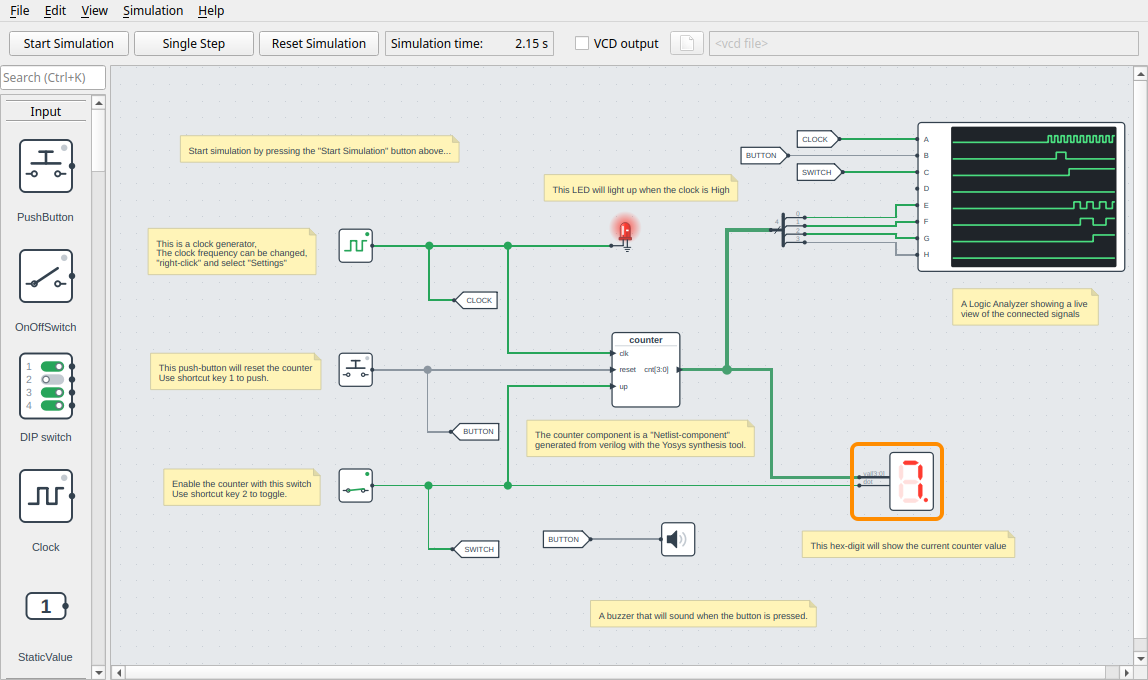
Click Stop Simulation when you have seen enough.
3. Open the Verilog editor
Right-click the counter component and choose Edit Verilog....
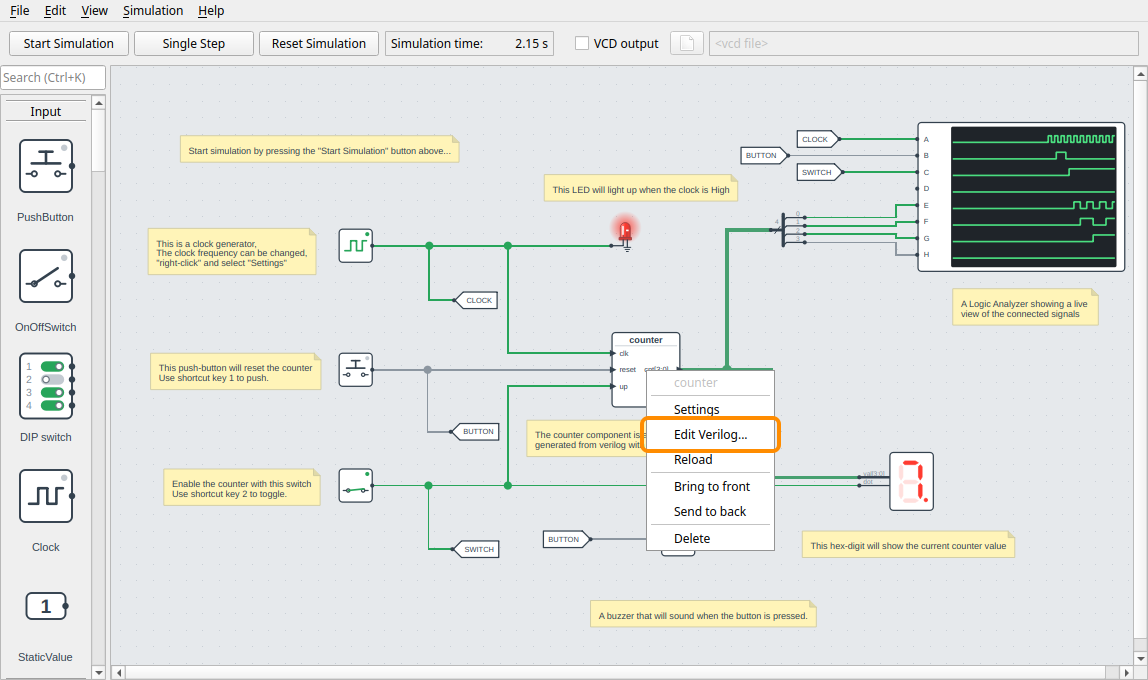
The menu item is there for every Verilog component made from a Verilog file (.v or
.sv). A component made from a Yosys netlist (.json) only has Reload.
4. A look at the editor
The editor opens in a window of its own, with counter.v:
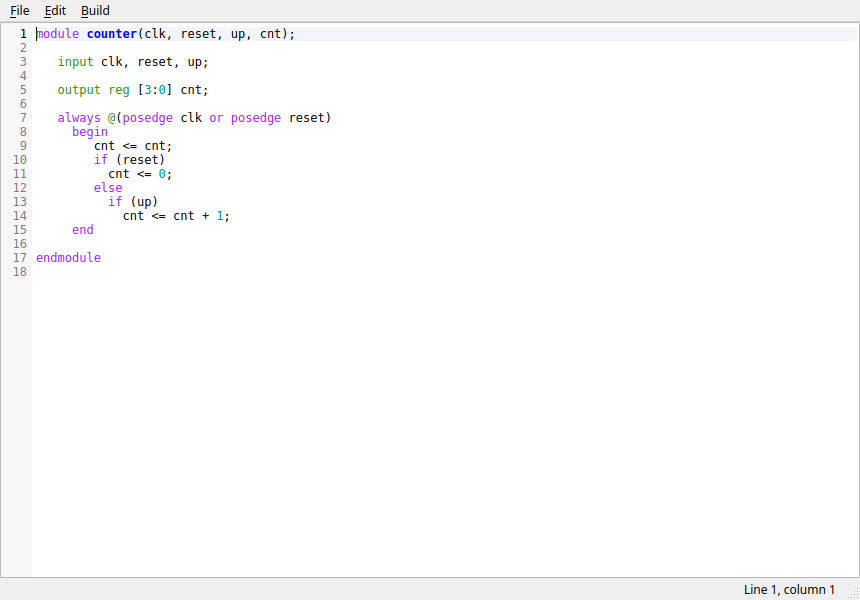
- The line numbers are on the left. The line with the cursor is highlighted, and the status bar at the bottom shows the line and column.
- The Verilog is colored like in the Emacs
verilog-mode: keywords likealwaysandbeginin purple, declarations likeinputandregin green, the module name in bold blue, numbers in cyan, and comments in red. - When the cursor is next to a bracket, the bracket and its match are highlighted.
- The menus are File (save, revert to saved, close), Edit (undo, cut, copy, paste, find and replace, go to line, comment out, indent) and Build (format, synthesize).
The editor edits the file, not the component. If two components are made from the same file, they share one editor, and Synthesize updates both.
The interesting line is line 14:
cnt <= cnt + 1;
On every rising edge of clk, when reset is low and up is high, the counter adds 1.
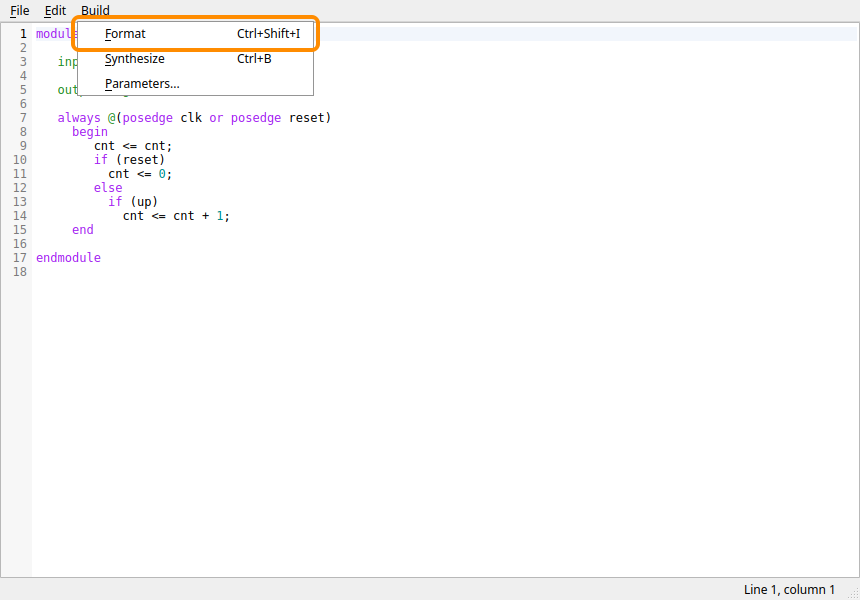
5. Format the Verilog
counter.v is indented with three spaces, and the statements under if and else with
two. Make the indentation even before you change anything: choose Build > Format, or
press Ctrl+Shift+I.
Each line is now indented four spaces for each block (module, begin) it is in, and a
statement under an if or an else one step more:
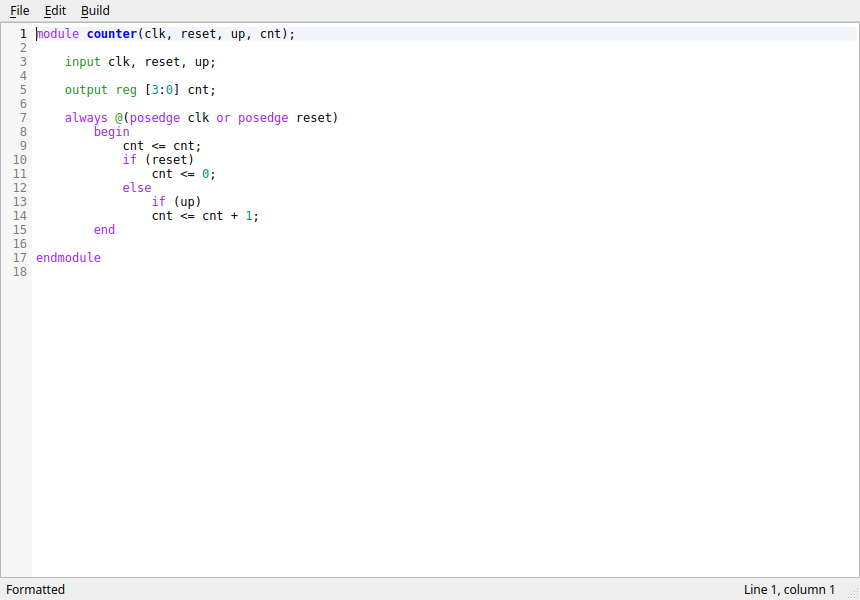
Formatting only changes whitespace: the indentation, spaces at the end of lines, and empty lines (at most one in a row). The code itself is never changed. If the formatter can't keep it the same, it leaves the text as it is and says so in the status bar.
Tip
Ctrl+Z undoes the formatting in one step. You can also format files from the command line, see Formatting Verilog.
The window title now has a *: the text has changes that are not saved.
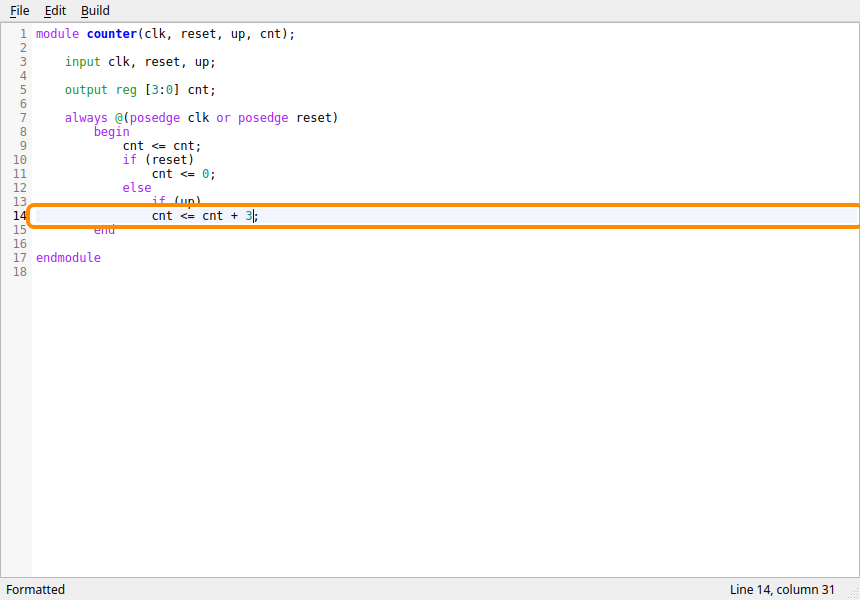
6. Make it count by three
Change the 1 on line 14 into a 3:
- Press Ctrl+G, type 14 and press Enter to go to line 14. You can also just click the line.
- Select the
1(double-click it), and type3.
Some keys that help when you write more Verilog:
| Keys | Action |
|---|---|
| Enter | A new line with the indentation of the line before, one step more after begin or an open bracket |
| Tab / Shift+Tab | Indent or unindent the selected lines (Tab inserts spaces) |
| Ctrl+/ | Comment out the selected lines, or remove their comments |
| Ctrl+F / Ctrl+H | Find, find and replace |
| Ctrl+S | Save |
7. Synthesize
Choose Build > Synthesize, or press Ctrl+B. The editor saves the file, and Yosys synthesizes it in the background, so DigSim keeps responding while it works. The build panel opens below the text, and shows each step:
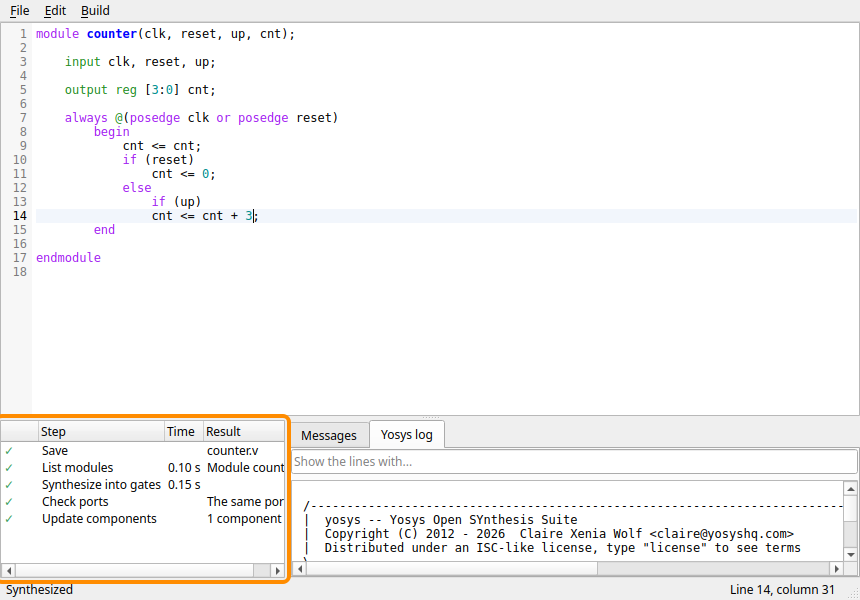
| Step | What it does |
|---|---|
| Save | Saves counter.v, Yosys reads the file from disk |
| List modules | Reads the Verilog and checks that the file has one module, as a Verilog component needs |
| Synthesize into gates | Turns the module into a netlist of gates and flip-flops. A component with Synthesize Verilog into functional blocks checked gets a step "Synthesize into functional blocks" instead |
| Check ports | Compares the ports of the new module with the component's. Here they are the same |
| Update components | Builds the components of the file from the new netlist |
A ✓ is a step that went well, a ⚠ one with warnings, and a ✗ one that failed. The Time column shows how long each step took, and Result what came out of it.
The tabs to the right show the Messages of Yosys (errors and warnings) and the whole Yosys log. The field above the log shows only the lines with the text you type.
When the components are updated, the simulation starts over at time 0, as after Reset Simulation. If it was running, it stops.
8. When the Verilog has an error
Mistakes happen, so here is what one looks like. Delete the ; at the end of line 14,
and press Ctrl+B again.
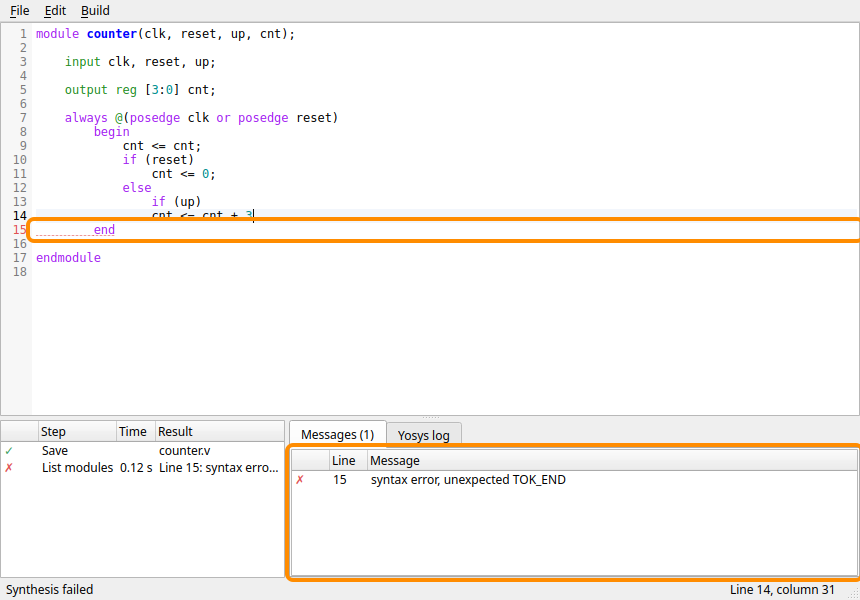
- The List modules step failed (✗), and its result says what Yosys found.
- The Messages tab lists the error with its line. Double-click it to move the cursor there.
- The line is underlined in the text, and its line number is red. Warnings are orange. The marks go away when you change the text.
Yosys reports line 15, not 14: it only notices that the ; is missing when it finds
end where the end of the statement should be. Look at the line before as well.
The counter component is not changed when synthesis fails. It keeps the Verilog it was built from, and the circuit still works.
Type the ; back at the end of line 14, and press Ctrl+B again. All steps get a ✓.
9. Run the new counter
Close the editor (File > Close, or Ctrl+W). It doesn't ask anything: the file is saved, and the counter is built from it.
Back in the main window, run the counter as in step 2: Start Simulation, reset with the push button (1), and enable with the switch (2). Now the hex digit counts by three: 0, 3, 6, 9, C, F, 2, 5, 8, ... The counter has 4 bits, so after F (15) it goes on at 18 - 16 = 2.
Tip
If you close the editor after saving, but without synthesizing, it offers to synthesize the file first. Yes synthesizes it and closes the editor when the counter is updated. No closes the editor and leaves the counter as it was.
10. Get the original back
The guide changed circuits/yosys_counter/counter.v. To get the original back, run this
in the root folder of your clone:
git checkout circuits/yosys_counter/counter.v
The circuit file itself is not changed, unless you saved it with File > Save.
What next
- Change the ports: add an output to the module, like
output carry, and synthesize. DigSim lists the port changes and asks first. New ports are added unconnected, and the wires to ports that are removed, or get another width, are removed. See Verilog component. - A new design: add a Verilog component, and choose New Verilog file. DigSim creates the file with a small module and opens it in the editor, see Your First Verilog Component.
- Faster simulation: select the counter, check Synthesize Verilog into functional blocks in the settings pane, and click Apply. The editor then synthesizes the file into functional blocks for it, see Gates or functional blocks.
- All the keys and menus of the editor: see The Verilog editor.